Okay, so don't judge me---but I'm blogging on a Friday night.
Or do...just don't tell me :-)
I can justify it though...I couldn't help staying in on a Friday while #thehub is away for the weekend for a bachelor party. It is SO. NICE. having the house to myself! I'm sure you all would agree.
Wine in hand, and Os on the TV, I'm ready to share my latest creations with you all.
That's right. Two. A double whammy. Woop Woop! Here we go.
When we first moved in our house, #thehub found the glass cabinet covers for the corner cabinets in our dining room. They were rounded, and kind of cool, but when I didn't want them back on the cabinets, they ended up just kind of hanging out in our garage.
Now, I had always secretly envied those big chalkboards painted on kitchen walls, so when we moved in, it was one of the first things i did---there it is again, proof I'm crazy. Unfortunately for me, when we repainted the kitchen a few months ago, we (ahem, HE) decided to paint over my greatest creation (So devastating for me!!!) Since then, I've been missing my chalkboard like whoa. Black Rob was even like "----whoa."
So what I decided to do was turn the class cabinet doors into my new kitchen chalkboard.
And really-----what this post is all about is Martha Stewart crackle paint. That stuff is the #BEESKNEES
Here's the before and after first. Then the det's...
 |
| A little chalkboard paint (sorry guys, forgot to take the original before! I get too excited.) |
 |
| Now this stuff is what you need to get. It goes on sort of like icing a cake. The thicker you put it on, the bigger the cracking. <insert witty pun here> |
 |
| After it was completely covered in crackle |
 |
| What the crackle paint looks like prior to drying/cracking |
 |
| The GORGEOUS after effect. |
 |
| How cool/authentic does that look? |
My next step was to make the paint look even more aged by wiping it with some stain I had laying around. I used one of those black craft sponges to "paint" it on, then let it dry for a minute or two, then wiped the excess off.
 |
| Before wiping off |
 |
| More "painting" |
 |
| After wiping the excess |
 |
More after
|
Finally, I needed to figure out a way to hang the chalkboard. I purchased some wire and picture hangers from home depot and strung it across the back. This wire is awesome by the way. The package even has a self cutter on it!
 |
stringing across the back. yes. that's me. glad you can't see my face because that was the "rainy crafty sunday" so obviously I am "at my best."
Just a little tutorial to follow on how to tie the wire... |
 |
| Twist once around |
 |
| Then twist up the wire running across the back |
 |
| Once you've twisted up a few times, twist back down, and fold then excess back up against the wire. You can test it out by pulling it, but the hold is really strong. |
 |
| #b*sbecrafty |
 |
| Now I can list my life away!!! #thehub is so happy... |
Lastly...
I wanted to quickly share my mother's day gifts I made this year...
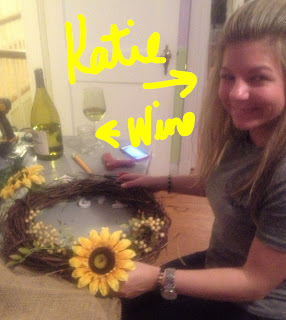
My girlfriend and I had a craft night, and made wreaths! I made one for my mom and mother in law, and katie---well---she made one for herself, then decided she should at least make one for her mom. #StingyB*!
 |
Momma Petri and Me! I got my craftiness from her most definitely.
Hope everyone had a great mother's day...and keep this in mind for a gift next year!!
<3 They all loved them <3 |
#B*
BlogThis!Share to FacebookShare to Pinterest


No comments:
Post a Comment